
If you’ve ever had a seed starter kit or explored the idea of mixing your own seed starting soil, chances are you’ve come across coconut coir. Some people like it, some people don’t. Before I could make my own opinion on the unusual dirt discs that came in the mail with some seeds, I asked myself, “What is coco coir anyway? Coconut bark? Is it like peat moss?” Here’s what I found:
What is Coco Coir?
According to Wikipedia, coir is a natural fiber found between the internal shell and the outer layer of coconut. It’s like the white pith of an orange. A natural byproduct of harvesting coconut, the coir has been used for centuries to make ropes and carpets. The coconut shells are soaked in water to soften the coir before it’s removed (usually by hand) and dried in large piles. Today this tough material is not only used by gardeners, but to manufacture upholstery, fill mattresses, and to prevent erosion control on riverbanks.
Coconut Coir vs Peat Moss vs Potting Mix
Coir is the dried pith of a coconut, and peat moss is a compost-like material produced in peat bogs. Both coir and peat moss have very high water retention, but few nutrients and high pH (coir is 5.5-6.5 pH). For these reasons, coir and peat moss are commonly used in potting mix recipes, but seldomly by themselves. Potting soil contains a combination of organic and inorganic materials and provides a wide range of nutrients for plants.
Coconut coir has been experiencing a little popularity boost lately among gardeners as a sustainable, renewable alternative to peat moss. Peat moss has long been considered a staple in the garden shed, especially for growers of specialty plants like orchids. Because of how slowly it grows in nature, many consider it to be a non-renewable resource and do not think it should be harvested. Coconut coir, on the other hand, is a highly renewable, natural byproduct of harvesting coconut.
Why Use Coco Coir to Start Seeds?
Most plants will not thrive on coco coir alone, but in certain situations, it can serve as the perfect growing medium. Coir may not have many nutrients to offer, but it can hold 10x its weight in water. Using coir as a potting medium is more like hydroponic gardening than anything else, and will need lots of supplemental fertilizer for long-term use. The seeds sprouting in the coir are essentially just growing in all the water held by the coir like they would if you germinated them in a moist paper towel. Unlike growing in water alone, the coir provides the tension and resistance necessary for healthy root development.
How to Start Seeds in Coco Coir
The first step in using coco coir as a seed starter is making sure you have a reliable coir provider! As we covered at the top of this article, coconut coir is used in a variety of different industries and may not always be safe to use with your plants. If you’re not careful with where you get your coir you could end up with salty coir that will kill your plants, chemical treated coir that will kill your plants or parasite infested coir that will kill your plants! Epic Gardening has a great round-up of reliable coir and fertilizer providers here.
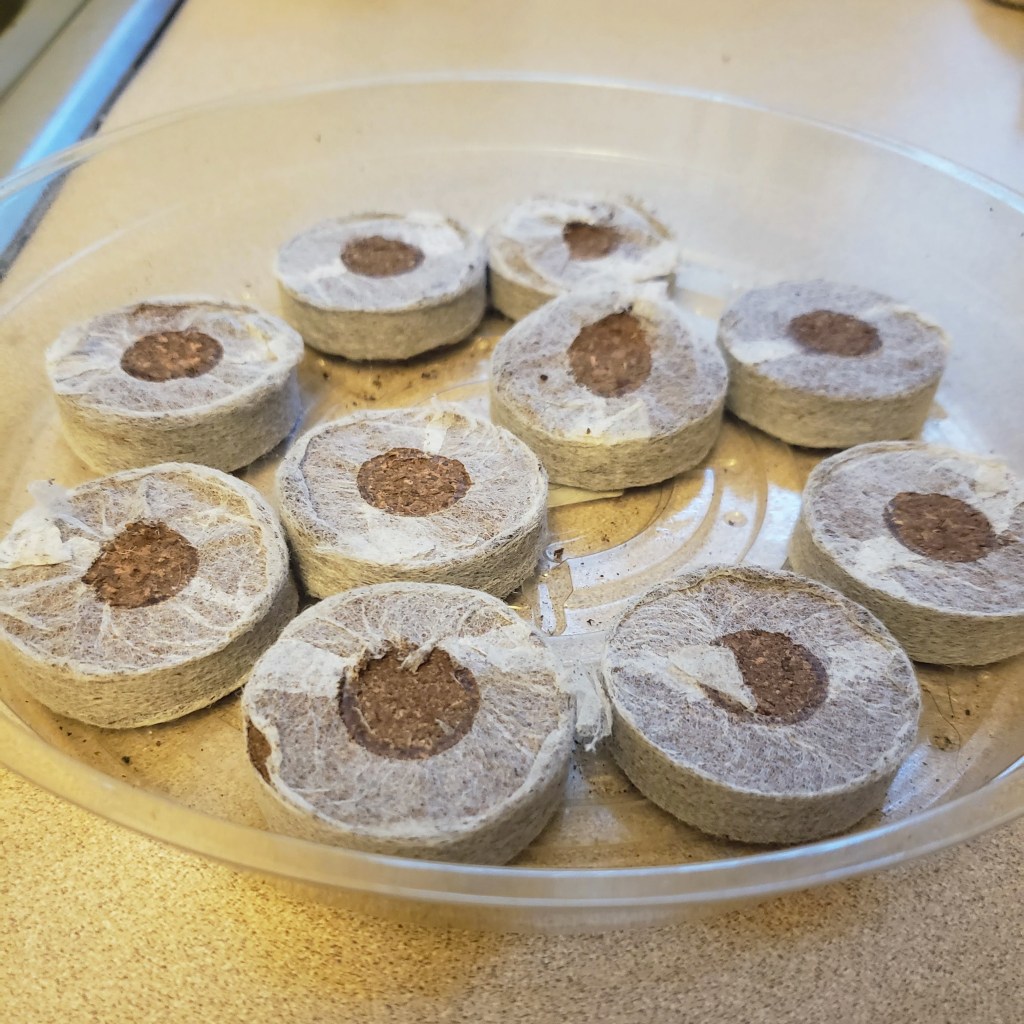
Once you have your coir and you know it’s safe, you’re going to want to get to hydrating. If you have coco coir pods or discs, you can set them in a plant tray full of water, open side up. If you have a coco coir brick, break off as much as you want to use and add it to a tray of water. Be careful not to add too much because it will expand A LOT! Drip trays for houseplants work perfectly.
The coir will soak up the water and expand very quickly – it’s pretty fun to watch! As soon as it’s completely soaked you can add your seeds.
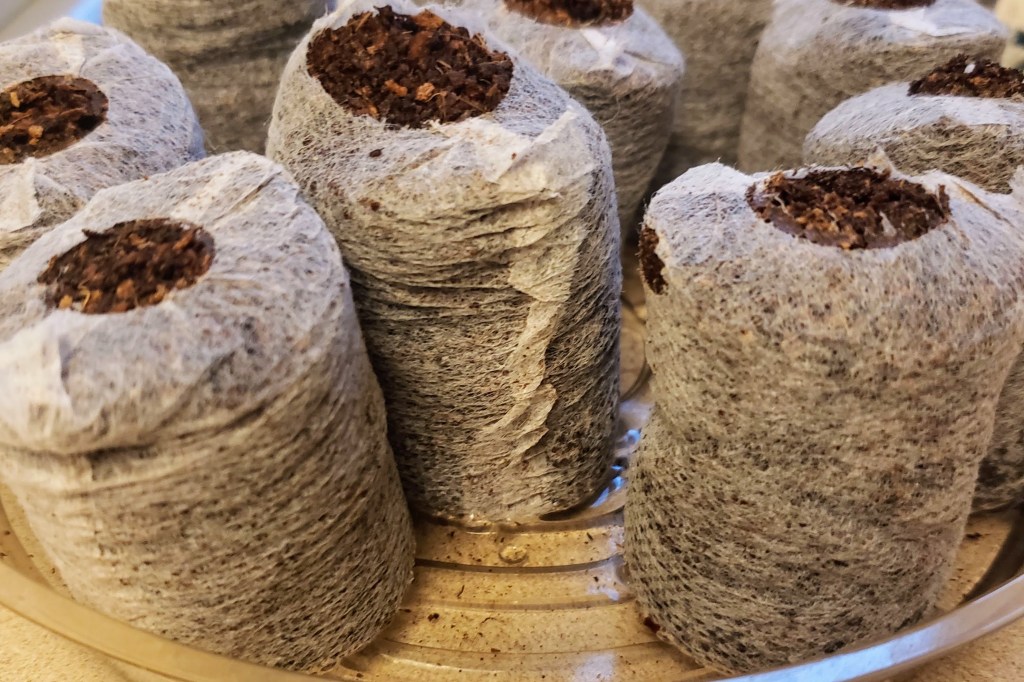
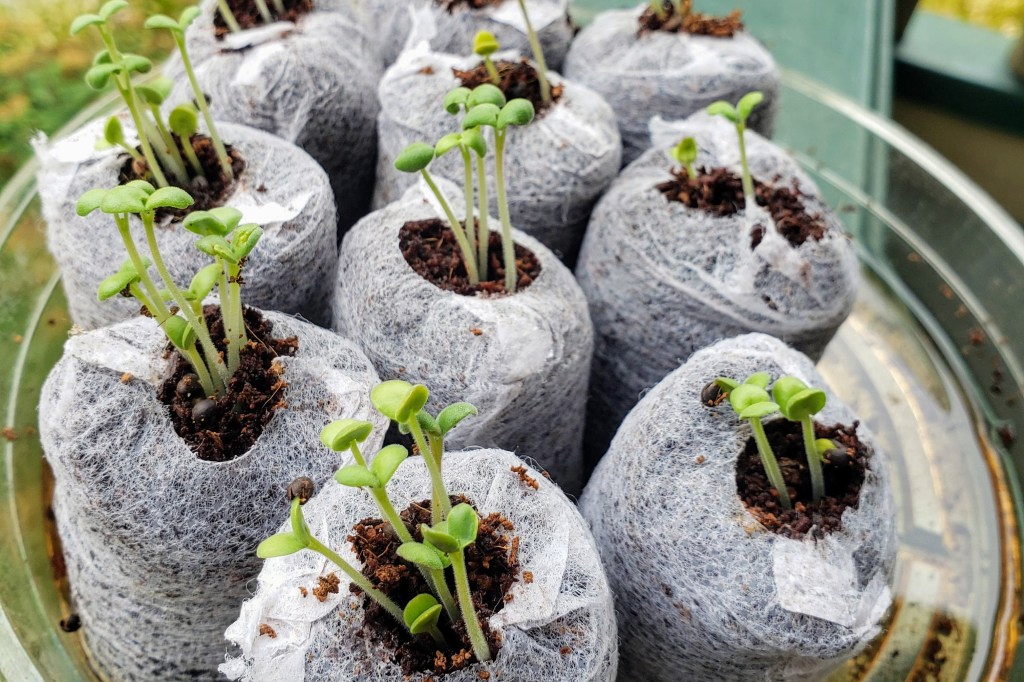
If you’re using pods, leave them in the tray and use your finger or a chopstick to create a small hole in the top of each pod at the opening. Add 4-5 seeds to each hole and cover the holes back up. Add water to the tray every day to keep the coir moist, and your seeds will be sprouting in no time! As soon as you see them poking through, keep them in bright sunlight. Before the seedlings get too big and run out of nutrients, you’ll want to feed them with some diluted fertilizer or plant them in some potting mix. To transfer them to the soil, all you have to do is dig a hole in your soil big enough for the coir pod to fit and just pop the whole thing in there! The material holding the coir in the pod shape will break down and allow the roots to grow freely.
If you don’t have the pods, the process is basically the same, just less tidy. Sow your seeds right under the first layer of coir and keep the coir moist. Provide sunlight and watch them grow! When the seedlings are established enough to move (around 2 inches tall), scoop them up with a spoon or your hands and plant them in a mixed potting soil. If you decide to leave them in the coir, you’ll have to fertilize regularly and monitor the pH. As long as none of your seedlings were infected with pests or ill, you can reuse the coir up to 3 times.
Since I learned how to use coconut coir effectively, I’ve had great results! It’s a perfect medium for propagating cuttings, creating your own potting soil mixture, and starting seeds, and growing mushrooms. It’s a renewable resource, and as long as you buy from a reputable source it’s pest-free and reusable. Using coco coir is a great way to get into hydroponic gardening. It’s fun for kids and adults alike!


One thought on “How to use Coconut Coir to Start Seeds”